Resident Evil 2 Where To Find Every Safe Combination & What They Contain
Resident Evil 2: Where To Find Every Safe Combination & What They Contain
Contents
Opening safes in Resident Evil 2’s remake is vital to getting useful items to help Claire or Leon along their journey in Raccoon City.
You Are Reading :[thien_display_title]

Resident Evil might be a series known for its horror, but solving puzzles has always been a big part of the games as well.
Some of Resident Evil 2’s (2019) puzzles involve finding and unlocking safes. The combinations to the safes are mostly hidden within files. However, as there are over fifty documents scattered in and around the Raccoon City Police Station, it’s easy to miss some. Here’s a guide to not only assist players in finding those combinations but reveal to them what’s inside each safe. Plus, there’s handy information about how to locate and open the unique portable ones too.
5 West Office Safe

In the west office of the Raccoon City Police Station, there’s a safe located next to the desk in the southwest corner of the room. During the first scenarios, players likely come across it way before they actually know the combination, as that is located in the S.T.A.R.S office on the second floor.
The three numbers are found in an internal memo behind Wesker’s desk in the northwest part of the room. In this case, there’s nothing to figure out as the code: “left 9, right 15, left 7” is clearly written in the memo for all to see. Opening the safe will net Leon or Claire a much-needed hip pouch to increase their inventory slots.
4 Waiting Room Safe

On the second floor of the Police Station, there’s a regular looking waiting room. Hidden behind the desk is a large safe that Leon and Claire can open. To get the combination for it requires the club key for Leon or the heart key for Claire, which are both unmissable items that are found when progressing through the story.
In Redfield’s scenario, she needs to get into the interrogation room located in the northern area on the first floor of the station. Once there, players need to get past the one-way mirror. Luckily, a Licker breaks through it as Claire attempts to leave the room. After dealing with the Licker, Redfield can then jump through the opening the creature made and find a confiscation report to her left. Paper-clipped to the report are some numbers and arrows, which is the combination for the waiting room safe (left 6, right 2, left 11).
For Kennedy, the report is much easier to grab as he can enter the observation Room — the same one Claire can jump into after the Licker attack — using his club key. And the report is in the same place it is for Redfield, next to the broken one-way mirror. What’s in the safe changes depending on who opens it. Claire finds an extended magazine for her JMB pistol, whereas Leon gets a muzzle brake for his Matilda.
3 Treatment Pool Room Safe

While in the sewers section of the game, players will enter the treatment pool room. And a safe is located by the south wall of this room. Luckily, the combination for this one is nearby. At the bottom of the stairs next to the cable car is the safe’s delivery report. It explains that the code to open the thing is written on the side of the safe itself. The report also instructs the owner to remove the combination for obvious safety reasons.
Yet, nobody decided to follow that instruction. So Leon and Claire only need to look at the right side of the safe to find the code they need, which is left 2, right 12, left 8. Kennedy finds a shotgun stock in the safe, which improves its accuracy. Claire, on the other hand, acquires a reinforced frame for her SLS 60 that enables Redfield to use high-powered bullets for the handgun.
2 Linen Room Portable Safe

During every playthrough of the game, a portable safe can be picked up from the Police Station’s linen room. This room is found on the second floor near the S.T.A.R.S office. However, to get in there, players need the Diamond key from the morgue in the basement. Once the linen room is unlocked, though, the safe is on a washing machine.
Portable safes work very differently to the others, as there’s no set combination to open them. Each player has to examine the safe in their inventory and attempt to get it open by pressing the buttons in a specific order. There isn’t a piece of paper with the sequence on, and it’s different for each player, so the only way to figure out the right combination is through trial and error. Players who get it open are rewarded with a spare key to use in the safety deposit room.
1 Locker Room/Observation Room Portable Safe
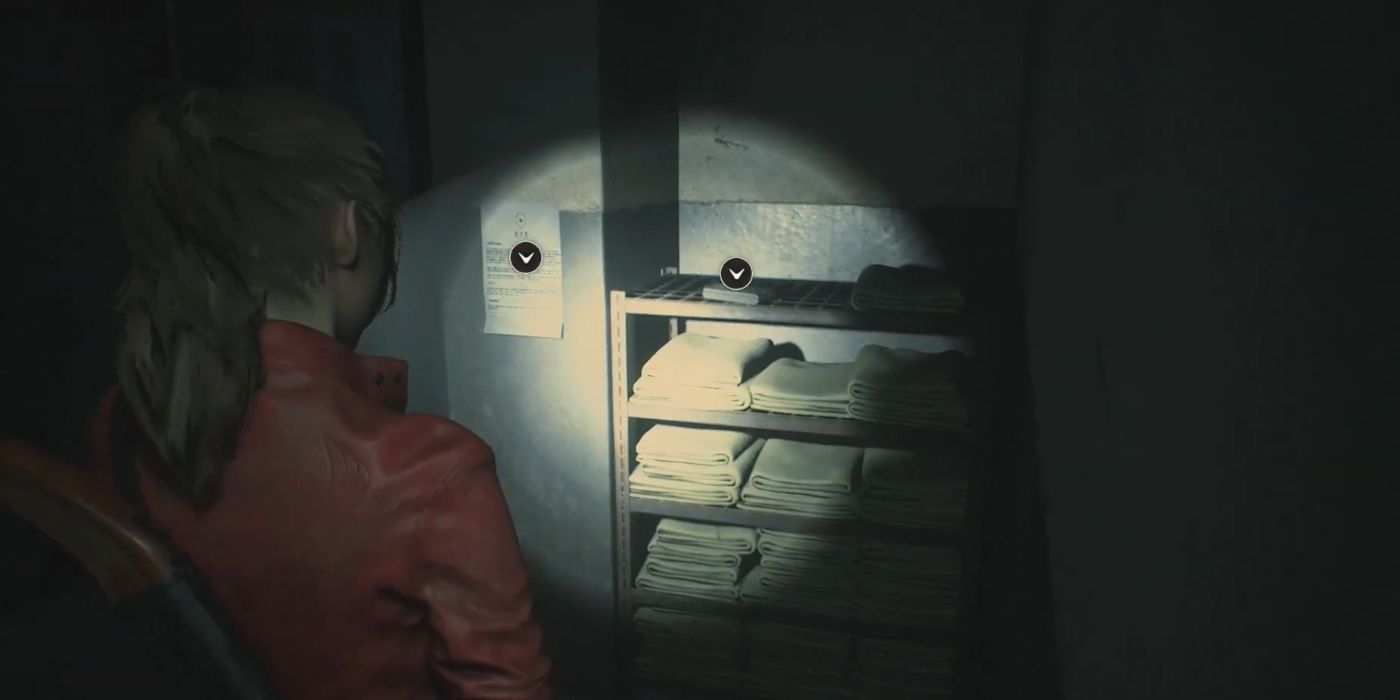
In both Leon and Claire’s first runs, a portable safe can be found in the shower/locker room on the second floor of the station. It’s to the player’s right as they walk through the door next to some towels.
Whereas in the two characters’ second runs, the safe is located in the observation room. This is the place that Claire can only access once a Licker has destroyed the one-way mirror in between the observation and interrogation rooms. And Kennedy enters the area by using his club key. For both of them, the portable safe is laid on the table in the middle of the room. Just like the other portable safe, it contains a spare key on both runs.
Link Source : https://screenrant.com/resident-evil-2-safe-lock-combination-location-guide/
Movies -Peaky Blinders 5 Best (& 5 Worst) Couples Ranked
Skyrim & Fallout 4 Mods Bethesdas Creation Club Explained
Persona 5 Royals Special Edition Is A Huge Bonus For Fans of Joker
Smallville 5 Times We Felt Bad For Lex Luthor (& 5 Times We Hated Him)
Pokémon Red & Blue Become Squid Game Ddakji Tiles In Hilarious Fan Art
Lost Every Season Ranked From Worst To Best
Resident Evil Villages Tall Lady Started As RE7s Mia
